What's new

Custom Mauser

mdwest

BoM Feb 13 - BoY 2013
Rating - 100%
161   0   0
Joined
Aug 1, 2012
Messages
6,805
Location
DFW
A couple of guys asked some questions about a custom mauser project I have been working on lately in another thread..

Rather than continue to be guilty of threadjacking, I thought I'd put up additional information here..

The long and the short of it is, I occasionally build guns.. Mostly AR's and single shots, but every now and then I'll get the bug and will build a bolt action from the ground up..

I am NOT a professional gunsmith and I am not a machinist.. I did take some gunsmithing classes 20+ years ago.. and several armorers classes way back int he day.. but I do not work on guns for a living, and do not have the experience or expertise most veteran smiths have.. At best I would consider my skills and abilities to be on par with a very new gunsmith apprentice..

All that to say.. building guns is really not all that hard and doesnt take a lot of specialty tools (for most guns).. If I can do it, anyone can.. What it does take is a lot of patience, paying a whole lot of attention to detail, and a willingness to slow down and check, double check, and then triple check every bit of work you do to make absolutely certain what you have done is right (you dont want your latest work blowing up in your face on your first outing at the range or falling apart on you the moment youre preparing to pull the trigger on a prized elk that you have spent the last 3 hours calling in)..

What separates a good gun mechanic (what I would consider myself to be) and a really good smith is "pretty" in my opinion.. a great smith will be able to ensure there are no visible tool marks on their work.. their lines on things like recoil pads, stock work, jeweling, checkering, etc will be perfect.. Whereas a guy like me is just happy to get a grind to fit recoil pad installed on the gun so that it is comfortable and doesnt look like total shit when Im done..

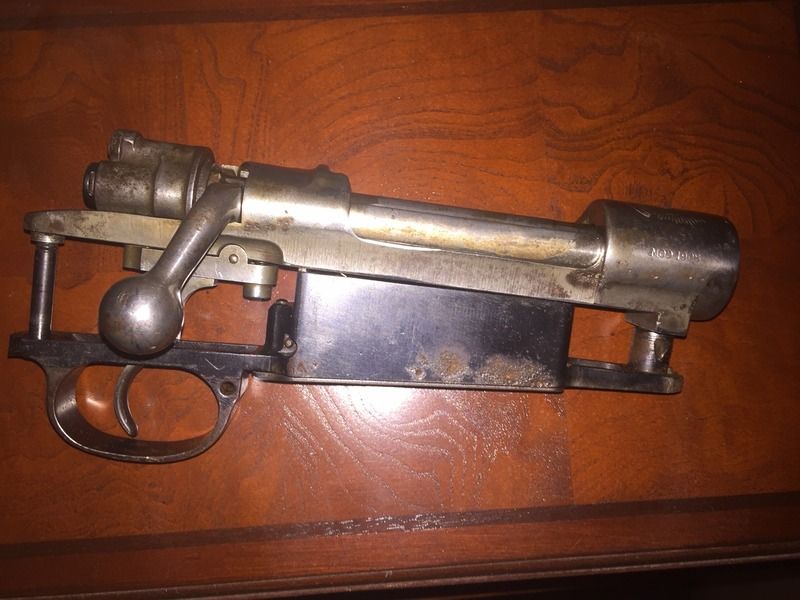
So enough background information.... Next post will be mauser build specific.. and have some pics included..
 

mdwest

BoM Feb 13 - BoY 2013
Rating - 100%
161   0   0
Joined
Aug 1, 2012
Messages
6,805
Location
DFW
Unfortunately I dont have any "before" pics.. I meant to take a bunch when I first procured my VZ-24, but that was almost 18 months ago.. and I didnt intend on posting a thread at the time... so.. it wasnt a priority and didnt happen...

Where the custom project started is pretty simple.. I came across a great deal on a BEATER VZ-24 rifle.. The VZ-24 is essentially a Large Ring Mauser that was built in the BRNO factory in the Czech Republic prior to WWII... Most mauser fanatics will tell you its is one of the best, if not the best pre-war mauser action ever made.. This particular rifle was a stellar find.. It was in HORRIBLE shape.. the bore was rusted and pitted badly.. the stock was cracked, and the hand guard was completely missing.. BUT.. the action was in nearly mint condition..

When I ran the serial number I found out that it was from a batch made for the Chinese government in 1937.. It was shipped to China, but likely never saw service.. The Japanese invaded China the same year and overran most of the Chinese armories very early on.. The rifle had very clearly not been stored well and probably not packaged well at some point when it was shipped from China to whatever journeys it made over almost 80 years before I got my hands on it... which was all VERY GOOD NEWS to me.. since all I really wanted from the gun was the action.. and the owner was willing to part with it dirt cheap since he saw it as a completely ruined old relic.. I paid $150 (including shipping and FFL transfer fees) and started ripping the gun apart immediately..

This is NOT a pic of my rifle.. but is provided for reference.. envision the gun in this pic after being run over by a truck, and with all metal surfaces covered in rust.. that would give you a clue of what I was dealing with..


What I've ended up with after tinkering for about a year is:


Yeah, yeah.. I know its pink.. Its for my wife.. :)

I still need to get a scope mounted on it.. and still need to get a finish applied to it.. Im thinking Ill just go with a flat black duracoat finish.. but am not 100% decided on that yet.. but as of last night its a working rifle..


Next post will contain a list of steps taken, tools used, etc...
 
Last edited:

mdwest

BoM Feb 13 - BoY 2013
Rating - 100%
161   0   0
Joined
Aug 1, 2012
Messages
6,805
Location
DFW
ok.. so step one was cleaning up the action and the bolt, reforging the bolt handle, and installing a new safety..

Like I said in the last post, every inch of the rifle was covered in surface rust.. thankfully there was no pitting on the action or the bolt though..

One of the challenges with a war era mauser is if you want to mount a scope on it, you have to "fix" the bolt handle.. depending on which model mauser you are dealing with the bolt handle is either straight or has a sort of circular bend to it that wont allow the handle to clear a scope... There are several ways to go about correcting this.. one is to grind off the original handle and then weld a new handle with the correct profile to the handle stub... another way is to reforge the handle.. I didnt want to deal with welds, and having to try to clean them up and make them look pretty on the bolt, so I chose the re-forge option..

The other challenge if you want to mount a scope on a mauser is the "flag" type safety wont clear a scope and cant be utilized..

Youve got a couple of different options for replacement safeties.. If you intend on replacing the military trigger, you can buy an aftermarket trigger group that includes a trigger safety.. there are also several different companies that offer a couple of different options for low profile safeties like Timney and Beuhler..

The timney safety for a large ring mauser is super easy to install (plenty of youtube videos out there showing you how to do it), and is largely a drop in part.. you MIGHT have to do a little polishing or some very minor grinding on it to get it to fit depending on the condition your bolt is in, who made the bolt, etc.. but again, its not hard, and nothing you cant do with a little sand paper and/or a dremel..

Stock photo of a normal military mauser safety:


Pic of Timney low profile safety after installation (you can also see where the bolt handle was reforged at a new angle in this pic):


You can buy the fixtures and tools needed to reforge bolt handles from midwayusa.com .. and reforging bolt handles is actually pretty easy to do (almost impossible to screw up).. but unless youre going to do a lot of them, its likely not worth the time and money to invest in the tools.. Especially when www.fincherscorner.com is out there.. They do pretty incredible work on bolts for really affordable prices.. For about $125 they not only re-forged my bolt handle, they completely polished the bolt, handle, safety, firing pin, springs, and every other component to the bolt, AND did a really cool engraving job on the bolt body for me (I had my wifes name engraved on it)..

Stock photo of a "normal" mauser bolt handle:


Pic of bolt body on my VZ24 after Finchers polished and engraved it for me:


I also drilled and tapped the receiver so that I could install scope mounts.. Nothing really special or difficult here... any old drill and tap kit you can pick up at Home Depot can be used... you just need a drill press and a jig to hold the action square that you can make yourself, the mounts you intend on using (I went with warne mounts.. a lot of mauser mounts require you to grind down the "hump" on the back of the action to install them.. the warne design doesnt require this.. and I like warne products.. so that was a pretty easy decision).. and thats it..

If you dont feel confident in doing the drill and tapping yourself, any gunsmith or machine shop can do it for you reasonably cheap and very quickly.. I wouldnt expect to pay more than about $10-$15 a hole tops if you wanted someone else to do it..

Next post = triggers and barrels..
 

Fozgate

Maker of Sharp Things #MCGA
Rating - 100%
12   0   0
Joined
Sep 16, 2017
Messages
365
Location
Chicago
Thanks for taking the time to share your build. The Mauser is an absolutely wonderful action and the rifle you've built for your wife is great!
 

mdwest

BoM Feb 13 - BoY 2013
Rating - 100%
161   0   0
Joined
Aug 1, 2012
Messages
6,805
Location
DFW
Installing a suitable trigger is in my opinion the easiest part of a mauser project..
You pull the military trigger out by punching out a single pin.. and the install the new one by inserting a single pin..

Youve got a ton of options for triggers out there.. I really like timney products, and since I had already gone with a timney safety, I chose a timney "sportsmans" trigger for this rifle..

the military trigger on a mauser is intentionally designed with a LOT of creep in it and a good bit of over travel as well, and is not adjustable..

The timney on the other hand is fully adjustable (I set the trigger on this rifle to just under 3lbs), and you can remove all creep and over travel.. the trigger on this gun breaks like an icicle now..


While the trigger was the easiest "fix", rebarreling was far and away the most challenging, and was the only part of the process that required me to purchase special tools..

Pulling the barrel off an action that has been in place for almost 8 decades and was installed with a pneumatic press is no easy feat.. It requires either a barrel vise, or a barrel jig that you can install in a standard vise.. and it requires an action wrench at a MINIMUM.. this barrel required a good bit more... after clamping it in a jig and in my vise and cranking the hell out of it with my action wrench, it didnt budge at all..

Im neither small nor weak (6'4", 290lbs, and reasonably strong for my height/weight), and all the energy I could put into removing the barrel was getting me nowhere.. I ended up soaking the action in liquid wrench for several days, and bought a 4' steel pipe that I slid over the handle of the action wrench to give me some more leverage, and then still ended up having to bang the hell out of the pipe extension with a 2lb drilling hammer to get the barrel to break free.. once it turned 1/4" inch, I was able to finish unscrewing it by hand...

Thankfully, tools required arent all that expensive... you can get an action wrench from midway USA for less than $60.. and I had a buddy of mine make the barrel jig for me out of aluminum (I traded him a couple cigars :) ).. another option if you dont own a vise or dont have a buddy that will make you a jig is to buy a barrel vise from midway USA.. I think they are about $50... or just have a local gunsmith yank the barrel for you.. he will definitely have a jig and a wrench.. but he will also likely charge you $100-$200 to do the work, which will only take you about 30 seconds to do yourself if you have the right tools..

Pic of jig and vise (vise is clearly nothing special.. I think I paid $29 for it on amazon a few years ago?) and pic of action wrench..


Once the old barrel was off, I took the action to a buddy that owns a sand blasting cabinet and blasted it.. this is NOT a necessary step.. I just did it because duracoat and cerakote adhere really well to blasted surfaces.. and I am lazy.. I could have just sanded the action with some 220 grit sand paper and prepped it just as well.. If you dont have access to a sand blasting cabinet, dont let that discourage you.. all you really need is sandpaper to prep your surfaces for your final finish..

Then it was time to install the new barrel.. to do this you need the action wrench and barrel jig again..

I ordered a .35 whelen barrel from midway USA.. they are $92.. "Green Mountain" barrels are really A&B barrels, and are known to be of pretty good quality (exceptionally good for the price).. the barrels come "short chambered" though.. every action, bolt, and barrel has to be fitted for head space.. building a bolt action isnt like the "lego" build of an AR.. you cant just unscrew one barrel, and then screw in a replacement or you will get jacked up head space, which will in turn cause jacked up chamber pressure, which in could turn into a rifle blowing up in your face (worst case scenario) or blowing hot gasses and debris all in your face (better case, but still shitty scenario)..

Installing a new barrel isnt hard though, and doesnt take any special skills other than patience and attention to detail.. anyone can do it (as long as you have the action wrench and jig)..

Basically screw the barrel down as tight as you can by hand.. then use the jig and wrench to cinch it down as tight as it can possibly go.. (I used the 4' extension bar again and cranked the crap out of it.. that barrel is going nowhere unless king kong gets his paws on it and wants to take it off)..

Once thats complete you have to finish out the chamber by with a finishing reamer..

Youre cutting steel here.. once its cut, you cant glue it back in.. and if you over cut, you are SCREWED.. so this is the part where patience and detail are paramount..

Reamers, a t-handle, and go/no-go gauges are pretty expensive.. so again, unless you are going to do this sort of thing for a living, its easier and cheaper just to rent them IMO.. 4D rentals (https://4drentals.com/) will send you everything you need for about $60 and let you use their stuff for a week.. if you already have your work station set up, finishing out a chamber is less than a 2 hour project (I completed the chamber on the 35 whelen in about an hour).. I didnt take any pics of me working on the chamber.. but youtube is your friend here... there are plenty of videos of guys showing how to do the job there.. it really isnt that hard at all.. just GO SLOW.. turn the reamer 3-4 times, then pull it out, clean it up, clean up the chamber, then test with the go-gauge, and if the bolt doesnt close, repeat the process over and over and over again until it does..

Once the action will close on the "go" gauge, insert the no-go gauge.. and make sure the action DOES NOT close on it..

If you have a nice snug fit and close on the go gauge, and the no-go wont close, you have a finished barrel and you are ready to go to the range..
 

mdwest

BoM Feb 13 - BoY 2013
Rating - 100%
161   0   0
Joined
Aug 1, 2012
Messages
6,805
Location
DFW
The only thing left to do after all of the above was to work on the stock..

I ordered a "classic" laminate stock from Boyds (https://www.boydsgunstocks.com/).. The problem is the stock was made to fit the military barrel profile (very thin) and the barrel I installed has an F34 profile (much heavier and thicker), and since it was designed to fit the mauser action in its original configuration, there was no channeling to support the lower profile bolt handle..

All stock work was done with a dremel and sand paper.. I just let the barrel channel out a bit, and carved out a place for the bolt handle, and was done.. no special tools required, and honestly no special skills required either.. if you are capable of doing very basic/simple woodwork and know your way around a rotary tool, you could easily do it too..


Depending on what caliber you want to build a custom rifle in, there could be more work to do.. thankfully the .35 whelen cartridge is close enough in size to 8mm mauser that no work was required on the magazine, follower, or feed ramp.. the action cycles perfectly with no modifications needed..

If you wanted to get radical and go with a cartridge that is significantly shorter, longer, fatter, or skinnier than the 8mm mauser, you might have to do some work on the bottom metal, mag, spring, follower, feed ramp, etc..


I've really only got a couple of things left to do on my rifle..

Tonight Im going to polish the feed ramp to a mirror/glass like finish.. its not necessary that I do that.. the rifle feeds well already.. but its easy to do (dremel, cotton wheel, and jewelers rouge.. and Ill be done in a matter of minutes).. so why not?

Then ill take it to the range this weekend and put a handful of live rounds through it to make sure I am 100% satisfied with how everything works and that no further tweaking and tuning is required..

After that Ill duracoat it and let it cure for a couple of weeks before I touch it again..

Once the finish is good and cured, Ill mount an optic (I've got a zeiss 3-9-40 that I think Im going to mount on it).. and it will be done..

Once the rifle is truly "finished" and ready to go start its new life as a deer slayer, I'll take some additional pics and post them up...
 
Rating - 100%
17   0   0
Joined
Jun 6, 2014
Messages
2,403
Location
Joplin, MO
Thanks for sharing with us. I bet your wife will love her new rifle. I hope when you get it finished and dialed in you will post some range target pics.
I am going to order a Boyd's stock for my Ruger American Predator 6.5 Creedmoor. I just can't seem to make up my mind on which one.
 

mdwest

BoM Feb 13 - BoY 2013
Rating - 100%
161   0   0
Joined
Aug 1, 2012
Messages
6,805
Location
DFW
I like 2 different Boyds stocks..

For guns Im going to shoot at a distance or potentially from the prone or a bench quite a bit, I like their "prairie hunter".. Its got a raised comb that helps with comfort.. and honestly, it just looks nice (2nd motivation)... I've got a prairie hunter on my 7mm wsm..

For most of my "working" guns, I prefer their "classic".. I've got boyds classics on 2x ruger americans (.308), and on the mauser .35 whelen I just built (thats a "classic" in the photos)..

Its a basic "american" stock profile with a standard LOP, standard drop at heel, flat comb, etc.. that is is extremely similar to the stocks you will get from the factory from ruger, winchester, remington, etc..
 
Rating - 100%
17   0   0
Joined
Jun 6, 2014
Messages
2,403
Location
Joplin, MO
I like 2 different Boyds stocks..

For guns Im going to shoot at a distance or potentially from the prone or a bench quite a bit, I like their "prairie hunter".. Its got a raised comb that helps with comfort.. and honestly, it just looks nice (2nd motivation)... I've got a prairie hunter on my 7mm wsm..

For most of my "working" guns, I prefer their "classic".. I've got boyds classics on 2x ruger americans (.308), and on the mauser .35 whelen I just built (thats a "classic" in the photos)..

Its a basic "american" stock profile with a standard LOP, standard drop at heel, flat comb, etc.. that is is extremely similar to the stocks you will get from the factory from ruger, winchester, remington, etc..
Great info! I am leaning towards the Prairie Hunter as I do plan on doing a lot more bench shooting with this gun, but it will be my deer rifle. Is the PH a lot heavier than the Classic? I don't think it will make much difference as I hunt with shooting sticks. Opinion? Any thoughts on the Boyd's AT-1?

Sorry for the thread jack. PM me if you prefer.
 
Last edited:

mdwest

BoM Feb 13 - BoY 2013
Rating - 100%
161   0   0
Joined
Aug 1, 2012
Messages
6,805
Location
DFW
Never actually put hands on the AT-1.. it looks well built in the photos I've seen.. and my experience with Boyds products in general is you get a pretty robust/solid product for your money.. so I would expect that it would be pretty decent.. but I cant personally testify to that..

The PH has a little bit more weight than the classic.. but its not really noticeable.. all laminates are heavy.. theyre great (IMO) for "tree stand" hunting, or for doing spot and stalks in the flat lands, or in the woods of the deep south, etc.. they can take a lot of abuse, arent as prone to warping as other wood stocks, and the extra weight helps them settle in nice on rests like sticks, sandbags, a pack, etc..

But a laminate wouldnt be my first choice if I was thinking about hunting mountain goats, big horn sheep, or anything that lives at elevation.. or on any hunt that I thought I was going to have to tote my rifle for miles and miles and miles on.. they are noticeably heavier than most standard walnut stocks.. and significantly heavier than most synthetic stocks you will find on rifles that are specifically designed for "mountain" or elevation type hunting..

The whelen I just built will be my wifes primary mid-bore (assuming she ends up liking it).. it will likely be what she takes on future safaris (not the one we're taking in March.. theres not enough time to get the CBP 4457 done and the permit knocked out in South Africa) to use on larger/tougher game.. for most african game you are riding in the back of a truck until you spot game at a distance, then you dismount.. and typically conduct a 100-300 yard stalk before you take the shot (not a whole lot of excessive rifle toting involved)... she might in the future also use it on nilgai, bison, moose, etc.. here in the US (nothing thats living above the timber line or that would require a 10 mile stalk to catch up with).. so a laminate was a perfect option for her..
 
Rating - 100%
17   0   0
Joined
Jun 6, 2014
Messages
2,403
Location
Joplin, MO
I think I am still leaning towards the PH. Physically hiking for miles on a hunt is not something I would attempt at my age and it looks like the benefits outweigh the burden of added weight. Thanks again for you feedback.
 
Rating - 100%
1   0   0
Joined
Jan 27, 2016
Messages
140
Wow! Yours is much nicer than mine. This is a belgian made FN, with a Greek crest.

It's already been sporterized by somebody else so im thinking about having it drilled and tapped


Sent from my SAMSUNG-SM-G891A using Tapatalk
 

mdwest

BoM Feb 13 - BoY 2013
Rating - 100%
161   0   0
Joined
Aug 1, 2012
Messages
6,805
Location
DFW
nice boomstick!

It looks like they took the original military stock and modified it so that it took on more of a "hunter" or "sporter" profile, and that you still have the original military barrel on there..

You've likely got a really good action on that gun.. From what I remember, most of the FN mausers that were made for the greeks were built in the mid 30's (a time period when FN was turning out some of the best quality actions in the world)..

I'm assuming its in 8mm Mauser (8x57)? If so, that is an ass kicker caliber that is really under appreciated here in the US.. its ballistically extremely close to .30-06, and makes for serious medicine on up to elk sized game..

Its hard to tell from the pic, but it looks like the bolt handle on your rifle has already been re-forged and should clear a scope.. it looks like you still have the original mauser 3 position safety on the gun too though.. if you do, you'll need to swap that out before you bother with drilling and tapping for scope mounts..

If you want to get fancy, you can spend hundreds of bucks and there are manufacturers out there like Dakota Arms that make "winchester" style 3 position side safeties that drop right in and work great..

For me, I just went with the timney low profile safety.. its an affordable 2 position safety that is rock solid.. I've got them on both the rifle in this thread and on a small ring 93 mauser and never had a problem with either of them.. theyre easy to install (youtube has several videos showing you how to do it) and if you want to polish it up to match your bolt, its super easy to do (a dremel with a cotton wheel and some jeweling rouge will bring it to a bright shine easily)..

https://www.midwayusa.com/product/473058/timney-buehler-style-low-swing-safety-mauser-98-blue
 
Rating - 100%
1   0   0
Joined
Jan 27, 2016
Messages
140
nice boomstick!

It looks like they took the original military stock and modified it so that it took on more of a "hunter" or "sporter" profile, and that you still have the original military barrel on there..

You've likely got a really good action on that gun.. From what I remember, most of the FN mausers that were made for the greeks were built in the mid 30's (a time period when FN was turning out some of the best quality actions in the world)..

I'm assuming its in 8mm Mauser (8x57)? If so, that is an ass kicker caliber that is really under appreciated here in the US.. its ballistically extremely close to .30-06, and makes for serious medicine on up to elk sized game..

Its hard to tell from the pic, but it looks like the bolt handle on your rifle has already been re-forged and should clear a scope.. it looks like you still have the original mauser 3 position safety on the gun too though.. if you do, you'll need to swap that out before you bother with drilling and tapping for scope mounts..

If you want to get fancy, you can spend hundreds of bucks and there are manufacturers out there like Dakota Arms that make "winchester" style 3 position side safeties that drop right in and work great..

For me, I just went with the timney low profile safety.. its an affordable 2 position safety that is rock solid.. I've got them on both the rifle in this thread and on a small ring 93 mauser and never had a problem with either of them.. theyre easy to install (youtube has several videos showing you how to do it) and if you want to polish it up to match your bolt, its super easy to do (a dremel with a cotton wheel and some jeweling rouge will bring it to a bright shine easily)..

https://www.midwayusa.com/product/473058/timney-buehler-style-low-swing-safety-mauser-98-blue
You are correct on all fronts. The crest is stamped 1930, and it is 8x57. I tend to like oddball rounds.

How is the timney safety you mention for lefties?

Sent from my SAMSUNG-SM-G891A using Tapatalk
 

mdwest

BoM Feb 13 - BoY 2013
Rating - 100%
161   0   0
Joined
Aug 1, 2012
Messages
6,805
Location
DFW
How is the timney safety you mention for lefties?
Im a lefty... I have no problem at all switching it on and off with my thumb while keeping my hand wrapped around the pistol grip section of the stock..

I dont have particularly big hands... if you have small hands you could have trouble reaching the safety with the thumb... but I think if you have medium to big sized mitts, you should be able to work the safety with no problem..
 

mdwest

BoM Feb 13 - BoY 2013
Rating - 100%
161   0   0
Joined
Aug 1, 2012
Messages
6,805
Location
DFW
and it begins again....


This one is going to become a 416 Taylor..

Since building the 35 whelen above, I also built a nice 7x57 on a small ring mauser action, and then we had a gunsmith do a full house custom job on another large ring mauser action I had in the safe and build my wife a 270..

I'm planning a cape buffalo hunt in 2019.. I thought it would be cool to build my own dangerous game rifle.. and then develop and load my own cartridge.. and take MY rifle and MY cartridge on the hunt..

Im giving myself until Christmas to get the rifle done and then will spend Jan/Feb working up different loads to see what is going to give me the best accuracy while still maintaining proper velocity suitable for a buff... then will be practicing my ass off March/April/May for the hunt..

The plan is to try to tag one of those big bastards on or around my 50th birthday in June.. :D
 
Top